Using Roblox Studio
This chapter is from the book
This chapter is from the book
This chapter is from the book
What You’ll Learn in This Hour:
![]() How to install and launch Roblox Studio
How to install and launch Roblox Studio
![]() How to use Studio templates
How to use Studio templates
![]() How to navigate game editor
How to navigate game editor
![]() How to create a part
How to create a part
![]() How to translate, scale, and orient parts
How to translate, scale, and orient parts
![]() How to save and publish your project
How to save and publish your project
![]() Playtesting
Playtesting
Now that we’ve explored the culture and features that make Roblox special, you can start to unleash your creativity with Roblox’s free game engine, Roblox Studio. Roblox Studio is a playground for developers to create, share, and play their games on the Roblox website. What’s great about this platform is that you can easily build everything from volcanic islands to urban cityscapes and then drop a character into that world to immediately start playing. Imagine a huge playground filled with all the tools you need to build imaginary worlds—that’s Roblox Studio.
In this hour, you’ll learn how to install Studio, and then you’ll learn how to use Roblox Studio with the help of templates. You’ll also learn how to arrange your workspace to hold objects in the 3D world, the difference between saving and publishing your project, and finally how to test your game before publishing it to the public.
Installing Roblox Studio
We’ve explained how Roblox Studio is a free and immersive platform for game developers to build different terrains, cities, buildings, race games, and much more. You don’t need years of coding experience or a degree to make fun games; all you need is your imagination and hands-on learning in the Roblox Studio. Roblox Studio is extremely intuitive to use. Because Roblox is cross-platform, developers can install Studio on both Windows and Mac systems.
Use the following steps to install Studio:
Click Start Creating and then click the Download Studio button in the pop-up window.
Navigate to the folder where you have downloaded Studio and double-click the file to install it.
NOTE
System Requirements
For Roblox Studio to run efficiently, there are some OS/hardware specifications:
![]() Roblox Studio cannot run on Linux, Chromebooks, or mobile devices such as smartphones.
Roblox Studio cannot run on Linux, Chromebooks, or mobile devices such as smartphones.
![]() A Windows computer with at least Windows 7 installed, or a MacBook with version macOS10.10.
A Windows computer with at least Windows 7 installed, or a MacBook with version macOS10.10.
![]() A minimum of 1 GB of system memory.
A minimum of 1 GB of system memory.
![]() Internet access to download Studio and updates. It also lets you save projects (publish) to your Roblox account.
Internet access to download Studio and updates. It also lets you save projects (publish) to your Roblox account.
For an enhanced Studio experience, you should also have these things (not mandatory):
![]() A mouse with a scroll wheel, preferably a three-button mouse.
A mouse with a scroll wheel, preferably a three-button mouse.
![]() A video card that’s dedicated and not an integrated card.
A video card that’s dedicated and not an integrated card.
Troubleshooting the Installation
If you’ve followed the necessary steps to install Studio but you’re experiencing installation conflicts, there are a few things you can do to troubleshoot the errors:
![]() If you’ve added new hardware or drivers recently, remove and replace the hardware to determine if it’s causing the problem.
If you’ve added new hardware or drivers recently, remove and replace the hardware to determine if it’s causing the problem.
![]() Run diagnostics software and check information on troubleshooting the operating system.
Run diagnostics software and check information on troubleshooting the operating system.
![]() Restart the computer.
Restart the computer.
![]() Uninstall and delete all the Roblox files and reinstall the latest Studio again, if required.
Uninstall and delete all the Roblox files and reinstall the latest Studio again, if required.
If you are still finding errors, you can also reference the Roblox Support forums online for additional tips.
Opening Roblox Studio
Once you are done installing the Roblox Studio, you need to open it:
Double-click the desktop icon if you are on Windows or click the Dock icon if you are on a Mac to open a login window (Figure 2.1).
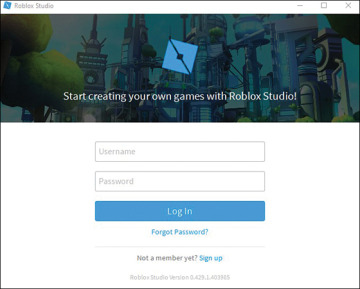
FIGURE 2.1 Roblox Studio login window.
Enter your Roblox username and password.
Click the Log In button.
)
Once you are logged in, you see a page with different templates and a menu sidebar with New, My Games, Recent, and Archive (Figure 2.2).
)
FIGURE 2.2 Roblox Studio home screen.
The following sections provide a quick introduction to these templates and the rest of Studio; then you can begin experimenting with the utilities of Studio.