- 11.1 Prepping the Gallery
- 11.2 Changing the Gallery Image
- 11.3 Setting an Image as Current
- 11.4 Changing the Image Info
- 11.5 Conclusion
Finish building a polished image gallery, display and swap custom images, and change the image title and description using JavaScript.
As a final application of our newfound JavaScript powers, in this last chapter we’ll build on the sample application developed in Learn Enough CSS & Layout to Be Dangerous (https://www.learnenough.com/css-and-layout). (We’ll be cloning the initial sample repository, so you’ll be able to complete this chapter even if you didn’t follow the CSS tutorial.) In particular, we’ll follow a time-honored tradition in JavaScript tutorials and create an image gallery, which will allow us to display and swap custom images—in our case, a fancy three-column layout (https://www.learnenough.com/css-and-layout-tutorial/flex-intro#sec-pages-3col).
After prepping the gallery (Section 11.1), we’ll learn how to change the gallery image (Section 11.2), set an image as “current” (Section 11.3), and change the image title and description (Section 11.4). Because our starting point is the professional-grade website developed in Learn Enough CSS & Layout to Be Dangerous, the result is unusually polished for a JavaScript tutorial sample gallery (Figure 11.1).
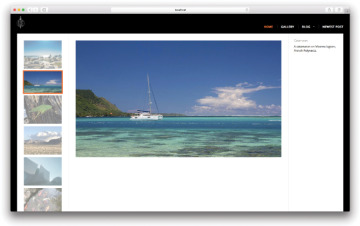
Figure 11.1: This is the gallery we’re looking for.
11.1 Prepping the Gallery
To get started with our image gallery, you’ll need to get a copy of the full starting application (https://github.com/learnenough/le_js_full) for the site. The first step is to make a personal copy of the app, which you can do using the fork capability at GitHub (Figure 11.2).
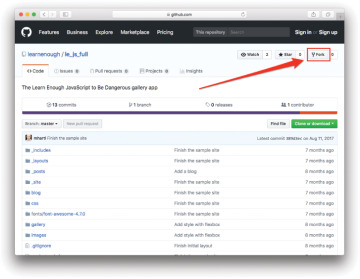
Figure 11.2: Forking the starting application at GitHub.
The next step depends on whether or not you currently have a GitHub Pages site at <username>.github.io. If you don’t have such a repository, you can rename your app accordingly (Figure 11.3), and it will automatically be available at the URL <username>.github.io.
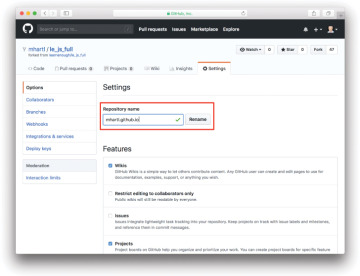
Figure 11.3: Renaming to the default GitHub Pages name.
Once you’ve renamed the repo, you can clone the gallery app to your local system using the clone URL from GitHub (Figure 11.4):
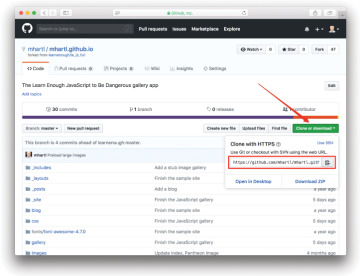
Figure 11.4: Getting the clone URL at GitHub.
$ git clone <clone URL> <username>.github.io
If you already have a repository at <username>.github.io from following Learn Enough CSS & Layout to Be Dangerous, you should clone the gallery app (without renaming it) to the default directory by omitting the second argument to git clone:
$ git clone <clone URL> # Command if you already have <username>.github.io
This will create a local repository called le_js_full, which you can use as a reference for copying over the required files. In particular, you’ll need the gallery index.html and the large and small images:
# Run these commands only if you already have <username>.github.io
# from following Learn Enough CSS & Layout to Be Dangerous.
$ cd le_js_full/
$ cp gallery/index.html /path/to/repo/<username>.github.io/gallery/
$ cp -r images/* /path/to/repo/<username>.github.io/images/
(If you already have a repo at <username>.github.io that isn’t the result of following Learn Enough CSS & Layout to Be Dangerous, I’ll assume you have the requisite technical sophistication to figure something out on your own.)
In either case, once the app is put together you can run it using the Jekyll static site builder. The Jekyll setup instructions (https://www.learnenough.com/css-and-layout-tutorial/struct-layout#sec-jekyll) in Learn Enough CSS & Layout to Be Dangerous explain how to install Jekyll on your system in case it isn’t installed already. The short version is that you first need to install Bundler:
$ gem install bundler -v 2.2.17
Then use the bundle command to install the jekyll gem listed in the Gemfile included with the repository:
$ bundle _2.2.17_ install
Once Jekyll is installed, you can serve the sample website by using Bundler to execute the correct version of the jekyll program:
$ bundle exec jekyll serve
At this point, the app will be running on localhost:4000, and should look something like Figure 11.5.

Figure 11.5: Our initial sample app.
11.1.1 Prepping the JavaScript
As a final bit of prep, we’ll add a stub for the main gallery function, activateGallery, which we’ll be filling in throughout the rest of this chapter. Because we’ll be doing everything in plain JavaScript, there will be no need to include any Node modules, run browserify, etc. In fact, all we’ll need to do is write a single function.
Our first step is to make a directory and JavaScript file (remember, this is in the app directory, not js_tutorial):
$ mkdir js
$ touch js/gallery.js
Just to get started, we’ll add an initial alert to gallery.js (Listing 11.1).
Listing 11.1: A stub gallery file.
js/gallery.js
function activateGallery() {
  alert("Hello from the gallery file!");
}
In the head of the file, we’ll include the gallery JavaScript using the src attribute (Section 5.2), and add an event listener (Section 9.2) to run the gallery activation function automatically after the DOM is loaded (Listing 9.9). The result appears in Listing 11.2.
Listing 11.2: Including the gallery JavaScript.
_includes/head.html
<head>
  .
  .
  .
  <link rel="stylesheet" href="/css/main.css">


  <script src="/js/gallery.js"></script>
  <script>
    document.addEventListener("DOMContentLoaded", function() {
      activateGallery();
    });
  </script>
</head>
Now visiting the local gallery page confirms that the JavaScript was loaded correctly (Figure 11.6).
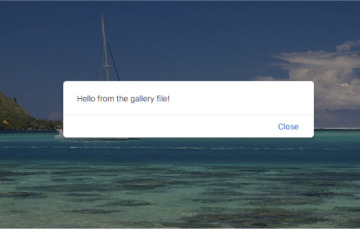
Figure 11.6: Hello from the gallery!
11.1.2 Exercise
Deploy your stub gallery to GitHub Pages and confirm that it works in production.

