- Lab 2.1 The SQL Execution Environment
- Lab 2.2 The Anatomy of a SELECT Statement
- Lab 2.3 An Introduction to SQL*Plus
This chapter is from the book
This chapter is from the book
This chapter is from the book
Lab 2.3 An Introduction to SQL*Plus
All Oracle databases include an installation of SQL*Plus by default. SQL*Plus is an Oracle software tool that allows you to execute SQL statements and SQL*Plus commands. It has been around since Oracle's early beginnings, and this command-line interface is available with every Oracle version and operating system. You can clearly see the age of SQL*Plus in its outdated interface, but this tool still serves many useful purposes.
Why Learn About SQL*Plus?
You might wonder what is the rationale of learning to use the command-line SQL*Plus when SQL Developer's graphical user interface is so much more intuitive. All the SQL statements and many SQL*Plus-specific commands work the same way in SQL Developer. Unquestionably, SQL*Plus seems quite arcane compared to SQL Developer, but knowing this old-style tool may come in handy when you're working with Oracle versions that do not support SQL Developer (such as versions prior to 9.2.0.1).
Furthermore, SQL*Plus is very suitable for executing scripts from the operating system prompt. A script is a saved file that contains one or more statements that allows you to rerun a command without retyping. This is useful when you need to rerun the same statements. You will learn about this in Chapter 14.
Starting SQL*Plus
If SQL*Plus program is installed on your Windows machine, you can access it by choosing Programs, Oracle, Application Development, SQL*Plus. This launches the program and displays the Log On dialog. Enter student as the username and learn as the password (both in lowercase) and press the Enter key. The password does not display onscreen.
Figure 2.32 illustrates a successful login with the correct username and password. Effectively, you have established a connection with the Oracle database as the user STUDENT. The client and the server can now communicate with each other.
)
Figure 2.32 The SQL*Plus prompt
The screen shows the version of SQL*Plus and the Oracle database. The SQL> command prompt indicates that SQL*Plus is ready to accept your commands, and you can begin to type. This is the default prompt for SQL*Plus.
You can also invoke SQL*Plus by typing sqlplus at your operating system's command prompt and entering the username and password when prompted to do so. Or you can include the login username and password directly on the operating system prompt, as shown in Figure 2.33.
)
Figure 2.33 Invoking SQL*Plus from the Windows operating system command prompt
You can also invoke SQL*Plus without logging in to the database by using the NOLOG option (see Figure 2.34). To connect to the database, you use the CONNECT command. The DISCONNECT (or DISC) command disconnects the session but does not exit SQL*Plus. Issuing a CONNECT command disconnects you from any previously connected session.
)
Figure 2.34 The NOLOG option and the CONNECT and DISCONNECT commands
Exiting SQL*Plus
To log out of SQL*Plus, either type EXIT or QUIT and press Enter. Alternatively, you can simply use your mouse to close the window. In the Windows operating system, you can also press Ctrl+C or Ctrl+Z, and in UNIX you can use Ctrl+D.
Exiting ends the session, and the STUDENT user is no longer connected to the database. However, there may be other client machines connected to the Oracle database; the server software continues to run, regardless of whether a client is connected to it.
The Remote Database and SQL*Plus
Often, a database resides on a machine other than your local client machine, or you have a choice of accessing different databases. In these cases, you need to supply a connect identifier, which directs SQL*Plus to the appropriate database.
Furthermore, you need to have Oracle's connectivity software, called SQL Net, installed. Typically when you perform a SQL*Plus installation, the SQL Net software is automatically installed for you. This is different from SQL Developer, which works with both a JDBC connection and SQL Net.
To use SQL*Plus to connect to a remote database called ITCHY, you enter the username, followed by the @ symbol followed by the connect identifier. Figure 2.35 shows such a logon example.
)
Figure 2.35 Using a connect identifier in SQL*Plus
The simplified syntax for the logon is as follows. The first syntax line prompts you for the password.
     username@connect_identifier
     username/password@connect_identifier
The connect identifier matches either an entry in a file called TNSNAMES.ORA or follows the Easy Connect syntax.
USING A TNSNAMES ENTRY
Essentially, the TNSNAMES.ORA file is a file that contains a list of databases with their respective technical connection information. It lists the database's IP address (or the machine name) and database instance name. Your database administrator can help you with the configuration and setup of this file if you have a remote database setup.
Following is an excerpt of a TNSNAMES.ORA file. The entries in your file will obviously vary. If you supply the host string ITCHY at login, SQL*Plus looks up the ITCHY entry in the TNSNAMES.ORA file. The HOST entry shows the machine name or IP address. The service name, or SID, entry identifies the name of the Oracle instance; here the instance is called ORCL. When you install Oracle with the default options, you are asked to supply an SID (system identifier). A common default name is ORCL.

The terms SID and service name are often used interchangeably, but they can be different, particularly in environments running Oracle RAC (Real Application Cluster) for fault-tolerant replication of data.
      ITCHY =
        (DESCRIPTION =
          (ADDRESS_LIST =
            (ADDRESS =
              (PROTOCOL = TCP)
              (HOST =ibmt41)
              (PORT = 1521)
            )
          )
          (CONNECT_DATA =
            (SERVICE_NAME = ORCL)
          )
        )
      SCRATCHY =
        (DESCRIPTION =
          (ADDRESS_LIST =
            (ADDRESS =
              (PROTOCOL = TCP)
              (HOST = 169.254.147.245)
              (PORT = 1521)
            )
          )
          (CONNECT_DATA =
            (SID = ORCL)
          )
        )
USING EASY CONNECT SYNTAX
The Easy Connect feature allows you to make a connection without the ITCHY entry being present in the TNSNAMES.ORA file. For example, you can connect to this database by supplying all the connection information.
student/learn@ibmt41:1521/ORCL
Or you can use the following.
student/learn@ibmt41/ORCL
This syntax shows the machine name called ibmt41 followed by the port number (the default port of the Oracle database is typically 1521), followed by the SID ORCL. Figure 2.36 shows how this connection is established in SQL*Plus.
)
Figure 2.36 Connection to SQL*Plus using the Easy Connect syntax
The syntax for the connect identifier using Easy Connect follows.
Host[:Port]/service_name
The host is the machine or IP address of the database server computer. The port specifies the listening port of the database server; if it is not specified, it defaults to 1521. The service name is the name of the database instance you want to connect to on this database server.
Generally, you create a TNSNAMES entry when you use the same connection frequently; it's far quicker to enter than a long Easy Connect string. Your organization may even have a dedicated Oracle Names Server that manages the connectivity of many servers without the need to maintain a TNSNAMES entry on client machines.
Logon Problems
Although this book cannot possibly list all the errors and solutions to all logon problems, let's look at are two very common Oracle error messages you may encounter.
TNS ERROR
A TNS error is usually related to the connectivity between the server and the client, using the Oracle Net client software. The following message is displayed if the connect identifier could not be resolved. This may be due to an invalid hostname or service name. You need to check the values and retry.
ORA-12154: TNS: could not resolve the connect identifier specified
INCORRECT USERNAME OR PASSWORD
Another error occurs if you entered the wrong username or password when the Oracle server attempted to authenticate you as a valid user. You need to double-check the spelling of your username, which is student, and your password, which is learn (both in lowercase). Starting with Oracle 11g, the password is case-sensitive by default. (If you cannot log on with this ID and password, check the readme file regarding the installation of the STUDENT schema.)
ORA-01017: invalid username/password; logon denied
If you are connecting to a remote Oracle database, be sure to enter the Oracle Net connection string supplied to you by your Oracle database administrator and recorded in your TNSNAMES.ORA file.
If you want to test whether the TNSNAMES entry is resolved correctly, you can ping the database with the TNSPING command from the operating system prompt. Figure 2.37 shows the execution and result of the command to determine whether the TNSNAMES entry ITCHY is valid and whether the server's listener program is running. From the output, you can see the file location of the TNSNAMES.ORA that was used to resolve the ITCHY name. Furthermore, you can see the host or machine name value and the service or instance name. The OK message indicates that the database's listener process is ready to accept your connection request.
)
Figure 2.37 TNSPING command result
Executing SQL Commands Using SQL*Plus
SQL*Plus requires the use of a semicolon (;) at the end of each SQL statement to execute the statement. Alternatively, the forward slash (/) can be used on a separate line to accomplish the same thing. In the following statement, we want to show only the DESCRIPTION column of the COURSE table.
     SQL> SELECT description
       2    FROM course;
Another way to do the same thing is to use the following statement.
     SQL> SELECT description
       2    FROM course
       3  /
Figure 2.38 shows the result of the execution of this query in SQL*Plus. You can scroll up and down to see the results.
)
Figure 2.38 Executing a SELECT statement in SQL*Plus
If you want to edit the statement, you can type the EDIT or ED command at the SQL> prompt. This evokes the Notepad editor in Windows (see Figure 2.39) or the default editor currently set in SQL*Plus. When you use the EDIT command at the SQL prompt, SQL*Plus stays open in the background, and your text editor is in the foreground, automatically displaying the SQL statement in the buffer.
)
Figure 2.39 Using the Notepad editor to edit a SQL statement in SQL*Plus
For quick editing of statements, simply make your changes here, save the file, and exit Notepad, which brings you back to SQL*Plus. (In this example, additional columns were added to the query.)
When the changes are saved, you exit Notepad, and the revised SQL statement is placed in the buffer area of SQL*Plus. You can then execute the statement with the forward slash on a new line, as shown in Figure 2.40.
)
Figure 2.40 SQL statement that is about to be executed with the forward slash command
When you invoke an editor, the SQL statement ends with a forward slash on a separate line at the end. SQL*Plus adds this character to the file so the file can be executed within SQL*Plus. Also, when you invoke the editor from SQL*Plus, you can't go back to the SQL*Plus screen until you close the editor.
The SQL*Plus Buffer
SQL*Plus stores the last SQL command you typed in what is referred to as the SQL*Plus buffer. You can re-execute a statement by just pressing the / key or typing the SQL*Plus RUN command. The most recent statement stays in the buffer until you enter another SQL command. You can use the SQL*Plus LIST command, or simply the letter L, to list the contents of the buffer. The semicolon or the slash, either of which executes the statement, is not stored in the buffer. The asterisk next to the number 2 indicates that this is the current line in the buffer. (Aside from using Notepad or any other editor, you can also use SQL*Plus's arcane Line Editor commands; these commands are described in Appendix C, "SQL*Plus Command Reference.")
     SQL>LIST
       1 SELECT description, cost, course_no, prerequisite
       2*  FROM course

In the Windows operating system, you can use the up and down arrow keys to recall previous SQL and SQL*Plus statements.
Formatting SQL*Plus Results
The result set is difficult to read when data "wraps" itself onto the next line. The result may look similar to the screen shown in Figure 2.41. This wrapping often occurs when your SELECT statement contains multiple columns. To help you view the output more easily, SQL*Plus offers a number of formatting commands. Note that these commands are not SQL commands but commands specific only to SQL*Plus.
)
Figure 2.41 SQL*Plus output wrapped
FORMATTING COLUMN ATTRIBUTES
The SQL*Plus COLUMN command allows you to specify format attributes for a column.
The following statement formats the DESCRIPTION column to display a maximum of 30 characters. If the values in the columns do not fit into the space allotted, the data wraps within the column. The column headings are truncated to the specified length.
COL description FORMAT A30
When you re-execute the SQL statement, the result is more readable, as you see in the result set shown in Figure 2.42. The format for the column stays in place until you either re-specify the format for the column, specifically clear the format for the column, or exit SQL*Plus. To clear all the column formatting, execute the CLEAR COLUMNS command in SQL*Plus.
)
Figure 2.42 SQL*Plus output formatted
The SQL*Plus commands such as the FORMAT command are not SQL commands and therefore do not require a semicolon or forward slash.
FORMATTING NUMBERS
If the column is a NUMBER data type column, you can change the format with a format model in the COLUMN command. For example, the 9 in the format model 999.99 represents the numeric digits, so the number 100 is displayed as 100.00. You can add dollar signs, leading zeros, angle brackets for negative numbers, and round values to format the display as you like.
     COL cost FORMAT $9,999.99
             SELECT DISTINCT cost
               FROM course
                   COST
             ----------
              $1,095.00
              $1,195.00
              $1,595.00


             4 rows selected.
One row in the COURSE table contains a null value in the COST column. As mentioned previously, DISTINCT recognizes one or more null values in a column as one distinct value when returning a result set.
If you do not allot sufficient room for numbers to fit in a column, SQL*Plus shows # symbols instead of the numbers.
     COL cost FORMAT 999.99
             COST
          -------
          #######
          #######
          #######

          4 rows selected.
For more SQL*Plus COLUMN FORMAT commands, see Appendix C.
Displaying the Number of Rows Returned
SQL*Plus sometimes does not show the number of rows returned by a query but rather depends on the feedback settings for your SQL*Plus session. Typically, the feedback is set to six or more rows. In the previous example, the feedback was set to 1, which displays the feedback line even when there is only one row returned. You will find this setting useful if your result set returns less than the default six rows and if any of the rows return nulls, which display as blanks by default. Otherwise, you might think it is not a row or value. To display the exact number of rows returned until you exit SQL*Plus, enter the SET FEEDBACK SQL*Plus command.
SET FEEDBACK 1
To display your current settings, use the SHOW ALL command or simply SHOW FEEDBACK. If you want to retain certain SQL*Plus settings, you can create a login.sql file for your individual computer in a client/server setup. You can also create a glogin.sql file for all users if you want them all to have identical settings (see Appendix C, "SQL*Plus Command Reference.")
SQL*Plus Commands versus SQL Statements
A SQL*Plus command is specific to the SQL*Plus execution environment. Unlike a SQL statement, a SQL*Plus command does not require a semicolon or backslash in order to be executed. SQL*Plus commands are commonly used for formatting query and report results, setting environment variables and runtime options, describing table and object definitions, executing batch scripts, and performing database administration tasks.
SQL*Plus commands come in handy when you have to create repeatable scripts; you will learn more about some of the useful SQL*Plus commands in Chapter 14.
Saving and Running SQL Statements in SQL*Plus
You can save your SQL statements within SQL*Plus. Type the following statement.
     SELECT *
       FROM course
Now edit the file in Notepad and select Save As to save it with the name C:\examples\myfile.sql. Exit Notepad and type and execute a new, different SQL statement.
     SELECT state
       FROM zipcode
This new statement is now in the buffer; however, you can execute a different SQL statement, such as the one you saved in myfile.sql, with the START or @ command.
SQL>@c:\examples\myfile
The statement in the file runs, producing a result set. Because the file already contains a forward slash, the SQL statement is executed automatically. If you save myfile with an extension other than .sql, you must type the file name and extension. If you want to change myfile again, simply type the following. Notepad will open, with myfile.sql containing your SQL statement.
SQL>ED c:\examples\myfile
Discontinuation of the SQL*Plus for Windows GUI Version
So far, you have learned how to use the Windows command-line version of SQL*Plus. In prior Oracle versions, a SQL*Plus Windows GUI version for the Windows Desktop was available. The functionality of the Windows command-line version and the Windows GUI version was almost identical. Starting with Oracle 11g, Oracle no longer ships the Windows version of the product and replaced it with the SQL Developer software.
Differences Between SQL Developer and SQL*Plus
Throughout this book you will see both SQL*Plus and SQL Developer mentioned. For the most part, the basic functionality of the two products is identical with respect to the SQL language.
One of the most obvious differences is the visual display of the result set and the user interface. Furthermore, instead of typing and then executing commands, SQL Developer allows you to perform many operations with a few mouse clicks. Table 2.1 highlights a number of the notable differences.
Table 2.1. Key Differences Between SQL Developer and SQL*Plus
|
SQL Developer |
SQL*Plus |
|
Graphical user interface. |
Command-line interface |
|
Editing in the SQL Worksheet text box. |
Editing from the SQL> prompt via the command-line editor or an invoked editor. |
|
SQL Developer automatically handles the formatting of columns to fit the width of the screen. |
Columns may not fit the whole width of your screen. Use various SQL*Plus formatting commands to make them display on one line. |
|
Allows connectivity to some non-Oracle databases. |
Executes only against an Oracle database. |
|
Works with Oracle versions 9.01 and above. |
All Oracle versions are supported. |
|
Has an auto-completion syntax feature. |
Requires knowledge of exact syntax and object names. |
|
Many of the typical SQL actions can be performed through the GUI, without writing an explicit SQL statement. |
Requires typing of the SQL command. |
|
A null value is easily distinguishable as "(null)" in the Results tab. |
There is no special display of null values unless you issue the SQL*Plus command SET NULL text. |
While SQL Developer simplifies many tasks, it can also allow a novice user to perform some potentially damaging actions using the menus. A good understanding of the effects of the underlying SQL operations is essential for making SQL Developer a productive tool. As you learn more about the SQL language and get more experienced in SQL Developer, you will appreciate many of its advanced features.
Lab 2.3 Exercises
-
After you have logged in to SQL*Plus with the user ID student and the password learn, what information does the SQL*Plus screen show you?
-
What do you learn when you type the command DESCRIBE instructor and press Enter?
-
Describe the result set you get when executing the following SQL statement. Format the result to make it more readable.
SELECT *
  FROM grade_type
-
Explain what happens, and why, when you execute the following SQL statement.
SELECT instructor_id, instructor_name
  FROM instructor
Lab 2.3 Exercise Answers
-
After you have logged in to SQL*Plus with the user ID student and the password learn, what information does the SQL*Plus screen show you?
ANSWER: The screen shows which version of SQL*Plus you are using, the current date and time, Oracle copyright information, and the version of the Oracle database software you are connected to. After this information is displayed, you see the SQL> command prompt. You can enter commands at this prompt.
-
What do you learn when you type the command DESCRIBE instructor and press Enter?
ANSWER: You can display the structure of your table with the SQL*Plus DESCRIBE command (see Figure 2.43). You can abbreviate the command as DESCR.
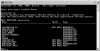
Figure 2.43 Executing the SQL*Plus DESCRIBE command
You can execute the same DESCRIBE command in SQL Developer, with the same result.
-
Describe the result set you get when executing the following SQL statement. Format the result to make it more readable.
SELECT *
  FROM grade_type
ANSWER: All columns and rows of the GRADE_TYPE table are returned in the result set. Your result may resemble the first listing of SQL output in Figure 2.44, displaying the wrapped columns. The second result shows the output nicely formatted after the SQL*Plus COLUMN commands are issued.

Figure 2.44 SQL*Plus output, both unformatted and formatted with SQL*Plus commands
-
Explain what happens, and why, when you execute the following SQL statement.
SELECT instructor_id, instructor_name
  FROM instructor
ANSWER: Oracle returns an error because the column INSTRUCTOR_NAME does not exist.
SELECT instructor_id, instructor_name
                      *
            ERROR at line 1:
            ORA-00904: "INSTRUCTOR_NAME": invalid identifier
If you use SQL*Plus, the asterisk in the error message indicates where the error occurs in the SQL statement.
The following is the correct SQL query.
SELECT instructor_id, last_name
  FROM instructor
)
)
Lab 2.3 Quiz
In order to test your progress, you should be able to answer the following questions.
-
A TNSNAMES entry is always required when you are using SQL*Plus to access an Oracle database.
_______
a) True
_______
b) False
-
SQL*Plus commands can be executed against non-Oracle databases.
_______
a) True
_______
b) False
-
SQL*Plus works with all versions of Oracle.
_______
a) True
_______
b) False
-
A SQL*Plus command must be ended with either a semicolon or a backslash.
_______
a) True
_______
b) False
ANSWERS APPEAR IN APPENDIX A.
Workshop
The projects in this section are meant to prompt you to utilize all the skills you have acquired throughout this chapter. The answers to these projects can be found at the companion Web site to this book, located at www.oraclesqlbyexample.com.
- Use SQL Developer to retrieve all the STATE values from the ZIPCODE table, without repeating the values.
- Recall one of the statements you executed in Lab 2.2, using the SQL History tab.
- What happens if you try to log on to SQL*Plus with the uppercase version of the password learn?
- Execute the following statements in SQL*Plus and record your observations.
SET NULL 'NULL'
SELECT DISTINCT cost
  FROM course